Most store owners don’t think much about invoices or packing slips until something goes wrong. A customer can’t understand the layout. Your team misreads a product line. A courier insists on a clearer document. Suddenly, what looked like a simple admin task turns into a daily irritation.
After helping businesses set up the
Webplanex Invoice Plugin across all kinds of WordPress and WooCommerce stores, one thing has become painfully clear:
Customizable templates aren’t a luxury, they’re essential.
Every business operates differently. Your invoices and packing slips should reflect that. They should feel like they belong to your brand, not something copied from a generic software tool.
This guide walks you through how to create clean, reliable,
custom Invoice templates using the Webplanex Invoice Plugin, without touching complex code or breaking your head over formatting.
Why Custom Templates Are Worth the Effort
An invoice or packing slip may not be glamorous, but it’s one of the few documents customers and internal teams rely on long after an order is placed.
A clear template can:
- Reduce “Where is my order?” questions
- Speed up your packing process
- Minimize shipping errors
- Help accountants and auditors
- Strengthen your brand identity
Every improvement saves time. And in eCommerce, time is money.
Step 1: Map Out What You Need to Show
Before opening the plugin settings, make a quick list of the details you must show in your invoices.
Most stores include:
- Business name, address, etc.
- Customer details
- Order number and date
- Product table with quantities
- Prices, discounts, taxes
- Payment method
- Notes or terms
Nothing fancy, just the essentials. Webplanex Invoice gives you all the core fields, so it’s mostly a matter of laying them out in a way that feels clear.
For packing slips, skip the pricing information. No customer needs the bill inside the box unless you want them to have it.
Step 2: Pick a Template Style Inside the Plugin
Webplanex Invoice includes several template presets that act as a starting point.
Think of them like outlines. Your job is to shape them into something that feels right for your store.
Some businesses prefer minimalist layouts. Others lean toward bold branding. There’s no “correct” choice, the goal is readability and accuracy.
Step 3: Add Your Branding
This part is surprisingly satisfying.
Inside the Webplanex Invoice settings, you can upload:
- Logo
- Brand colors
- Header and footer messages
- Store contact details
Use branding carefully. A splash of color at the top is enough. Too much decoration makes invoices look cluttered, especially when printed.
A few tips from real store setups:
- Use high-quality logos but keep the size moderate
- Stick to 1–2 brand colors
- Use readable fonts: invoices are often printed on regular paper
- Keep the header compact so it doesn’t push the content down too far.
Let the branding support the content, not steal the spotlight.
Step 4: Add and Adjust Dynamic Fields
The Webplanex Invoice Plugin supports dynamic placeholders, small tags that automatically pull order data into your template.
These include values like:
- Order total
- Billing address
- Shipping address
- Product list
- Tax breakdown
- Payment notes
You don’t need to memorize everything. The plugin lists all available places, so you can simply add them where they belong.
This step is about placing each field intentionally so your document “flows” properly.
For example:
Good layout:
Customer details → Order info → Product list → Totals → Footer
Bad layout:
Totals at the top, product details buried at the bottom, random notes interrupting the table.
Think about the way your eyes move, and make the template follow that path.
Step 5: Build a Product Table That Doesn’t Break
This is where most invoice plugins fail. Fortunately, Webplanex Invoice gives you control over how product rows look.
Your product table might include:
- Product name
- SKU
- Quantity
- Unit price
- Line total
The challenge: product names can be long.
Always test with:
- Products
- Discounted orders
Step 6: Create a Clean Packing Slip Layout
Packing slips are for your warehouse, not accounting, so keep them simple.
In Webplanex Invoice, you can build an entirely separate packing slip layout. It usually includes:
- Order ID
- Customer name
- Shipping address
- Product list
- SKUs
- Quantity
No prices. No totals. No taxes.
Adding barcodes or QR codes can save time and be helpful.
Step 7: Insert Optional Elements (Only If You Need Them)
Webplanex Invoice supports a range of optional components:
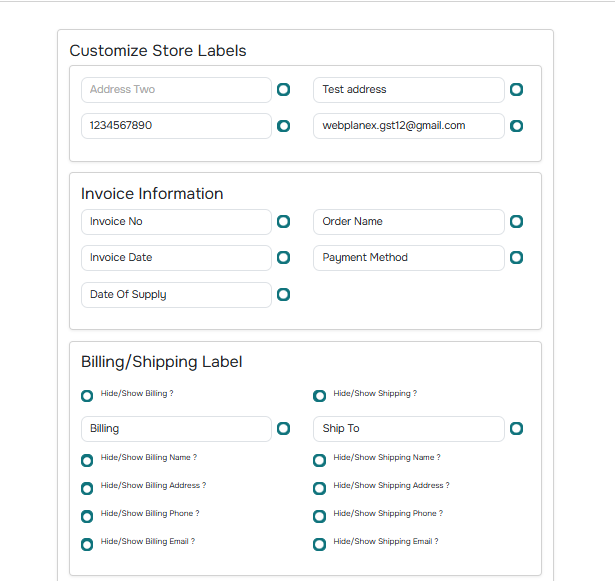
- You can Customize store labels, add invoice Information or Billing/Shipping label:
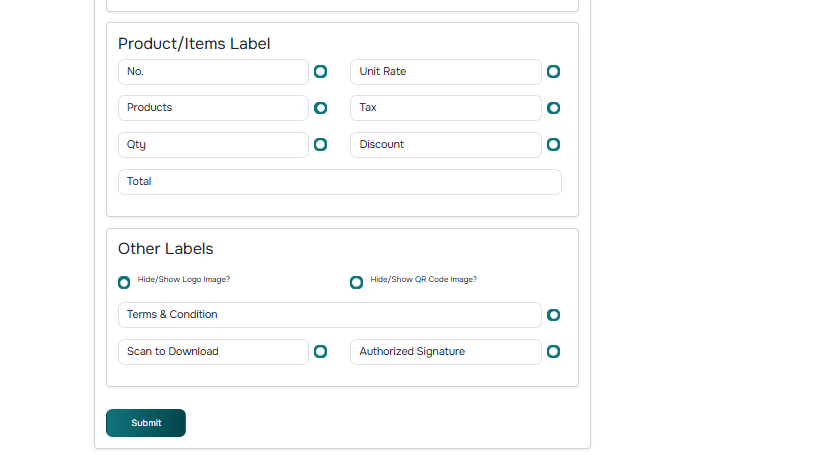
- Add Product/Item Labels in Webplanex Invoice:
- QR codes
- Terms & conditions
- Branding blocks
Use them sparingly. A clutter-free document is far easier for customers and staff.
Step 8: Preview and Test
The preview mode inside the plugin helps you spot formatting issues instantly.
But don’t stop there.
Print the invoice. Print the packing slip. Open them on mobile. PDF preview them on desktop.
Use different test orders:
- COD
- Partially refunded
- Discounted
- Bulk items
- Subscription renewals
Testing prevents surprises during busy seasons when the last thing you want is errors appearing on documents. Avoid silly mistakes such as:
Step 9: Keep Templates Updated as Your Store Changes
As your business grows, your paperwork needs may change too.
Maybe you expand into wholesale.
Maybe you need to meet new rules.
Maybe your branding evolves.
Review your templates every few months and ask:
- Is something missing?
- Are customers still asking for clarifications?
- Do warehouse staff find it easy to use?
- Are tax fields still compliant?
Small improvements add up fast.
Conclusion
Customizing invoice and packing slip templates with Webplanex Invoice isn’t just about making documents look good. It’s about making your store run smoother.
A clean invoice reduces support tickets.
A clear packing slip speeds up fulfillment.
And both documents help create a more professional customer experience.